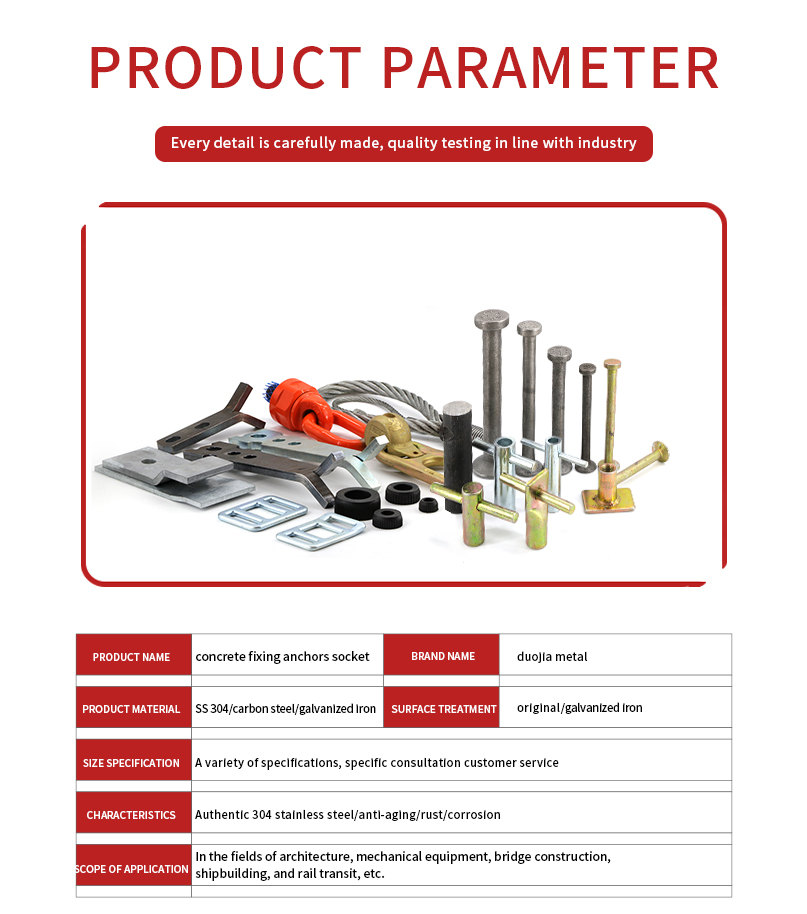
✔️ Material:Stainless Steel(SS)304/Carbon steel
✔️ Surface:Plain/original/White Zinc Plated/Yellow Zinc Plated
✔️Head:HEX/Round/ O/C/L Bolt
✔️Grade:4.8/8.8
Product Introduction
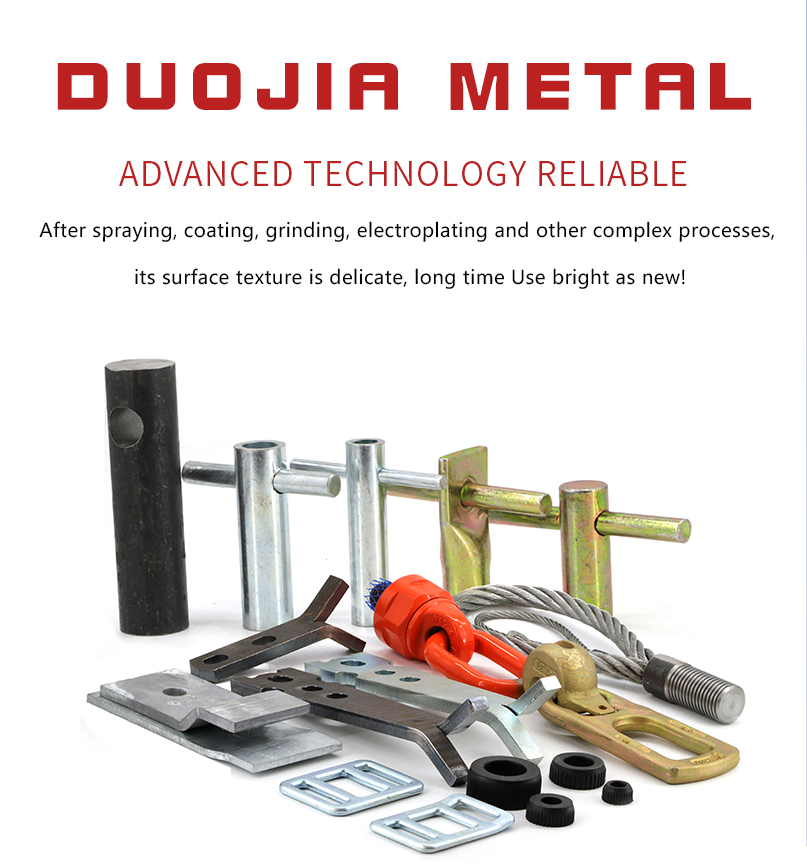
This 3Pcs Fixing Anchor, also known as an expansion bolt, is a commonly – used fastening component. It is mainly composed of a screw rod, an expansion tube, a nut, and a washer. Generally, it is made of high – strength steel, and its surface is usually treated with anti – corrosion processes such as galvanization, presenting a metallic luster. This effectively prevents rust and enhances its durability in various environments.
Working Principle: By drilling a hole in the base material (such as concrete, brick wall, etc.) and inserting the anchor into the hole, when the nut is tightened, the expansion tube will expand in the hole and fit closely with the base material, thereby generating significant friction and anchoring force to firmly fix the object.
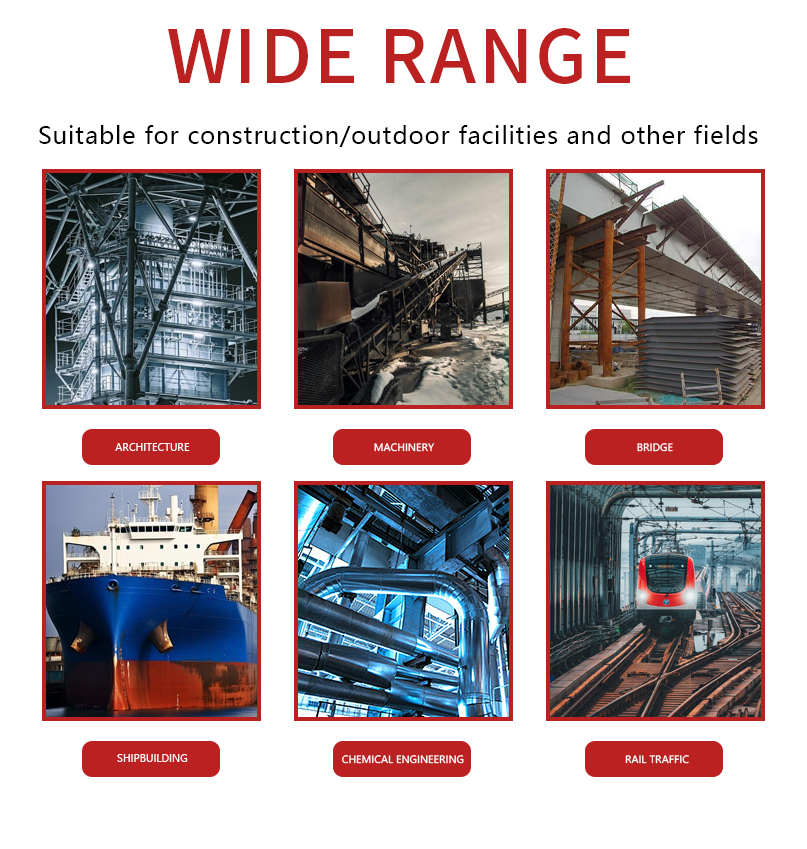
Application Scenarios: It is widely applied in construction, decoration, furniture installation, and other fields. For example, in construction, it is used to fix doors and windows, pipe supports, cable trays, etc. In home decoration, it can be used to install bookshelves, storage racks, bathroom equipment, etc.
Usage Instructions
- Pre – installation Preparations
- Specification Confirmation: According to the weight and size of the object to be fixed and the type of base material, select a fixing anchor of the appropriate specification. Check parameters such as the load – bearing capacity in the product manual to ensure that the anchor meets the actual requirements.
- Appearance Inspection: Carefully check whether the surface of the anchor has cracks or deformations, and whether the galvanized layer is uniform and intact. If there are defects, it may affect its performance and service life, and it should be replaced in a timely manner.
- Tool Preparation: Prepare installation tools such as an impact drill and a wrench. Select a drill bit that matches the specification of the anchor. Generally, the diameter of the drill bit should be the same as the outer diameter of the expansion tube of the anchor.
- Drilling
- Positioning: On the surface of the base material where the anchor needs to be installed, use tools such as a tape measure and a level to accurately measure and mark the drilling position. Ensure the position is accurate to avoid offset after installation.
- Drilling Operation: Use an impact drill to drill a hole perpendicular to the surface of the base material. The drilling depth should be slightly greater than the effective anchoring depth of the anchor. For example, if the effective anchoring depth of the anchor is 40mm, the drilling depth can be controlled at 45 – 50mm. Keep stable during the drilling process to prevent an overly large hole diameter or a rough hole wall.
- Installing the Anchor
- Cleaning the Hole: After drilling is completed, use a brush or an air pump to clean the dust and debris in the hole to ensure the hole is clean. If there are impurities in the hole, it will reduce the anchoring effect of the anchor.
- Inserting the Anchor: Slowly insert the anchor into the hole so that the expansion tube is fully inserted into the hole. Do not use excessive force during insertion to avoid damaging the expansion tube.
- Tightening the Nut: Use a wrench to tighten the nut. As the nut is tightened, the expansion tube will expand and open in the hole, closely engaging with the base material. Pay attention to applying even force during tightening to prevent the anchor from tilting.
- Fixing the Object
- Checking the Anchoring Effect: Before fixing the object, gently shake the anchor to check if it is firmly fixed. If it is loose, re – tighten the nut or check if there are problems in the installation process.
- Installing the Object: Connect the object to be fixed to the anchor through corresponding connecting parts (such as bolts and nuts). Ensure the connection is firm to prevent the object from loosening or falling off during use.
- Post – use Maintenance
- Regular Inspection: After using for a period of time, regularly check the tightness and surface condition of the anchor. Check if the nut is loose and if the galvanized layer is worn or corroded.
- Maintenance Measures: If the nut is found to be loose, tighten it in a timely manner. If the galvanized layer is damaged, anti – rust paint can be applied for protection to extend the service life of the anchor.